如果需要将自己写好的python打包,并发布到pypi,这样其他人就可以直接通过
pip install来安装对应的包,可以参考如下教程1. 注册pypi账号并创建token
首先访问https://pypi.org/ 并注册账号
然后跳转到账号设置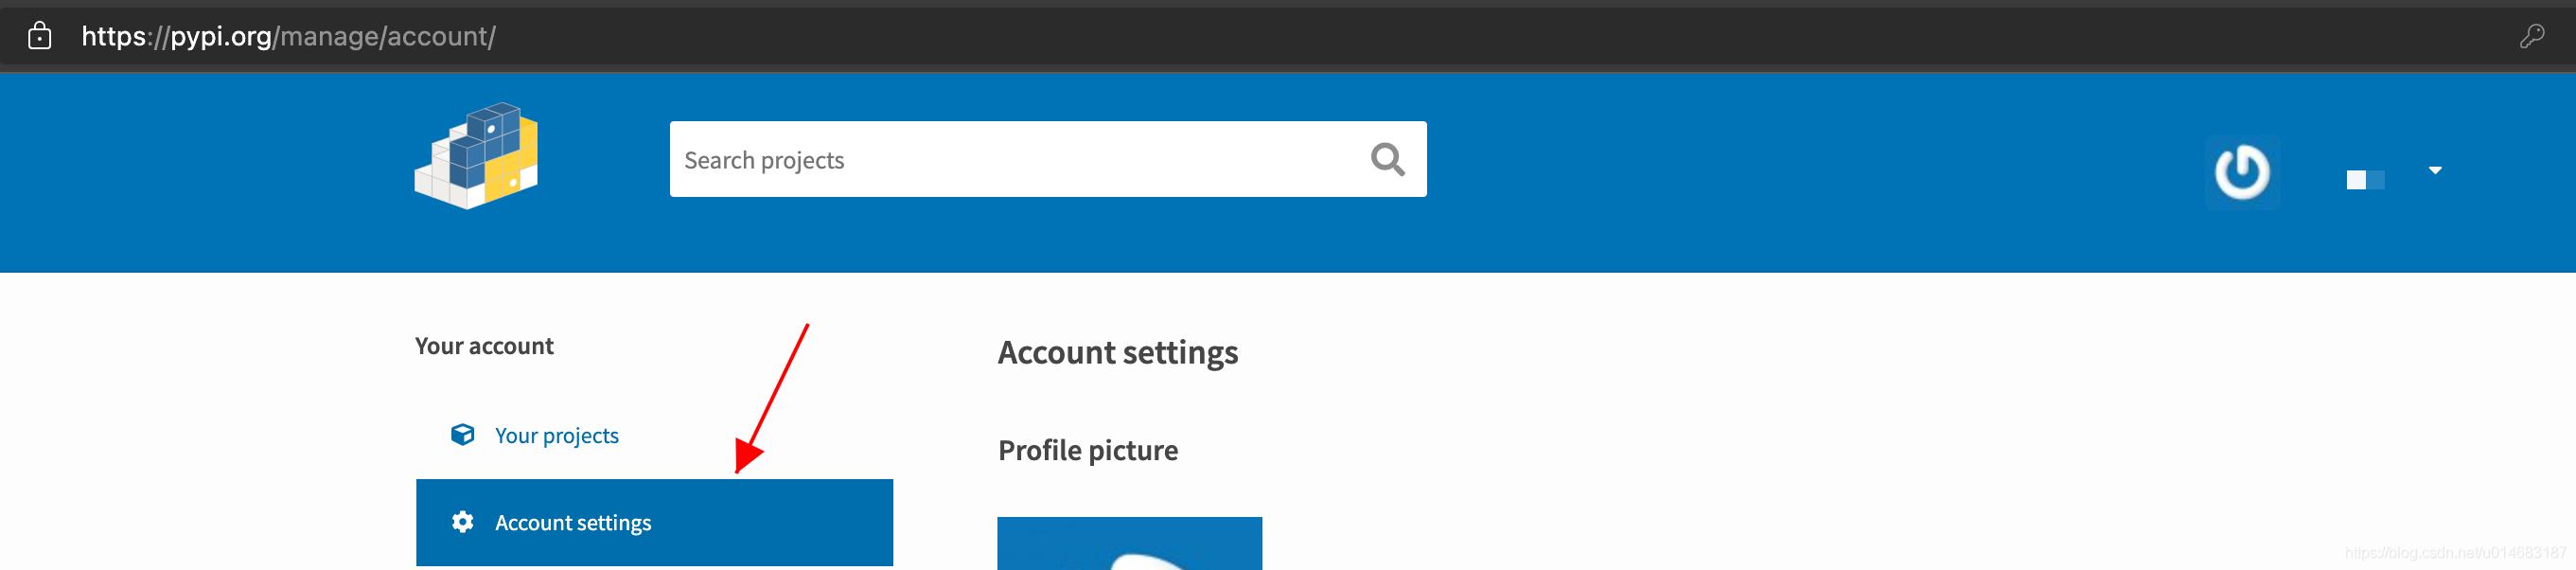
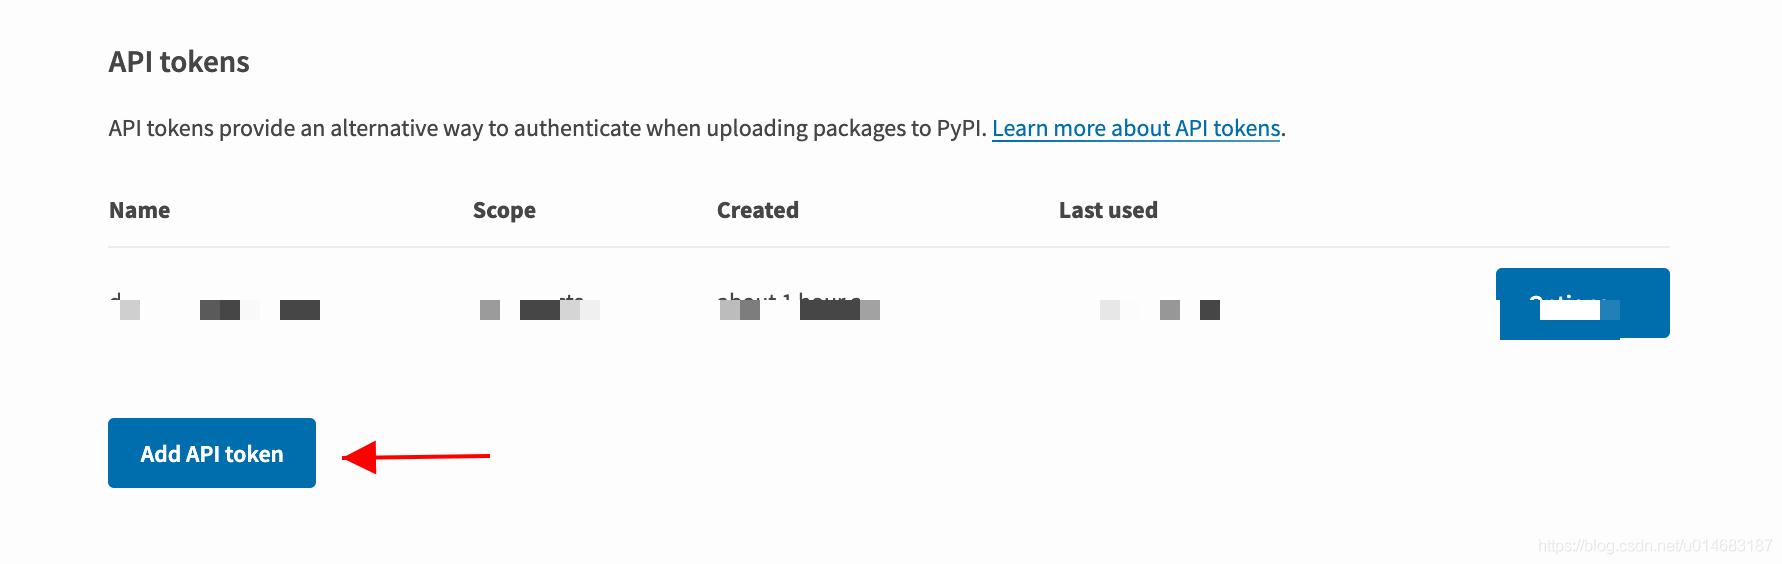
然后选择API token->Add API token
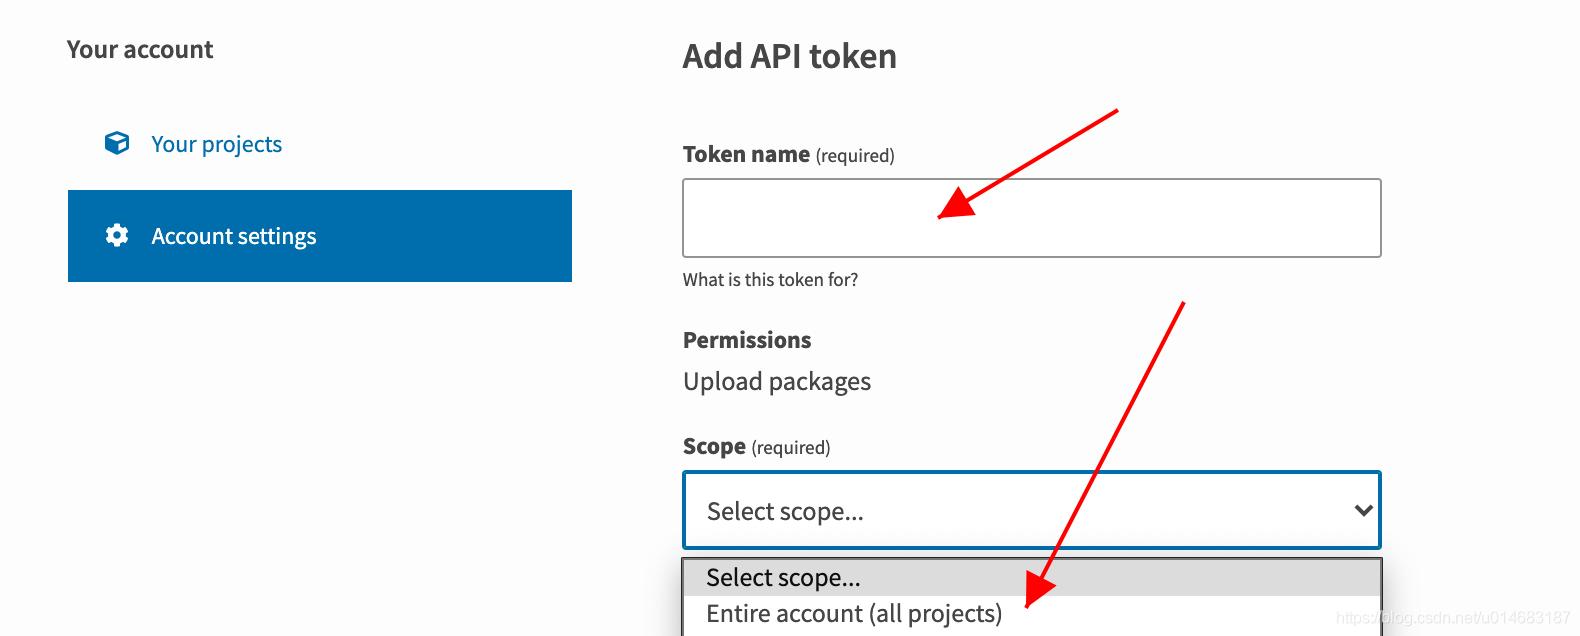
输入token name并在Scope中选择Entire account(第一次需要选择Entire account)
然后在本地,修改
.pypirc文件
输入的内容为:[pypi] username = __token__ password = {token}只需要修改
{token}为自己的token即可2. 编写setup.py和setup.cfg
setup.cfg的内容为
[metadata]
license_files = LICENSE.txt
LICENSE.txt是license文件,需要自行编写
setup.py在根目录下,一个示例为from setuptools import setup import compileall from os import path # 读取readme文件,这样可以直接显示在主页上 this_directory = path.abspath(path.dirname(__file__)) with open(path.join(this_directory, 'README.md'), encoding='utf-8') as f: long_description = f.read() compileall.compile_dir("src") setup( name='my-python', version='1.0.2', packages=['src', 'src.main', 'src.main.config'], url='https://github.com/hTangle', license='Apache 2.0', author='hTangle', author_email='', description='', keywords='', python_requires='>=3.4, <4', long_description=long_description, long_description_content_type='text/markdown', install_requires=['requests'] )具体的字段含义如下:
name: 包名version: 版本号,支持如下形式1.2.0.dev1 # Development release 1.2.0a1 # Alpha Release 1.2.0b1 # Beta Release 1.2.0rc1 # Release Candidate 1.2.0 # Final Release 1.2.0.post1 # Post Release 15.10 # Date based release 23 # Serial releasedescription: 包描述,会放在如下图所示的位置处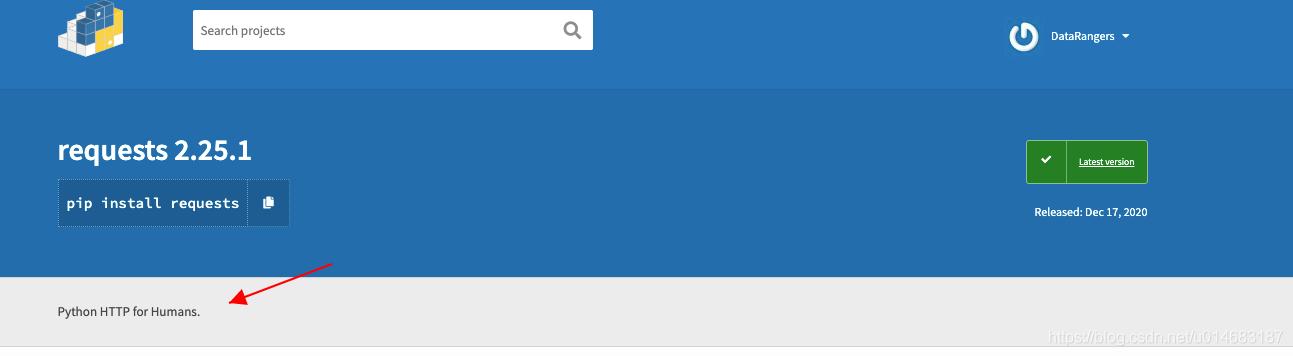
url: 包的链接,可以使用github链接,pypi会自动获取到仓库的信息,示例如下:
author: 作者license: 许可证classifiers: 分类,示例如下:classifiers=[ # How mature is this project? Common values are # 3 - Alpha # 4 - Beta # 5 - Production/Stable 'Development Status :: 3 - Alpha', # Indicate who your project is intended for 'Intended Audience :: Developers', 'Topic :: Software Development :: Build Tools', # Pick your license as you wish (should match "license" above) 'License :: OSI Approved :: MIT License', # Specify the Python versions you support here. In particular, ensure # that you indicate whether you support Python 2, Python 3 or both. 'Programming Language :: Python :: 2', 'Programming Language :: Python :: 2.7', 'Programming Language :: Python :: 3', 'Programming Language :: Python :: 3.6', 'Programming Language :: Python :: 3.7', 'Programming Language :: Python :: 3.8', 'Programming Language :: Python :: 3.9', ],keywords: 关键字,和论文的关键字类似project_urls: 一些项目的其他链接,示例如下project_urls={ 'Documentation': 'https://packaging.python.org/tutorials/distributing-packages/', 'Funding': 'https://donate.pypi.org', 'Say Thanks!': 'http://saythanks.io/to/example', 'Source': 'https://github.com/pypa/sampleproject/', 'Tracker': 'https://github.com/pypa/sampleproject/issues', },packages: 需要打包的目录,需要以根目录为起点,可以使用find_packages自动查找包,注意不要漏写install_requires: 包依赖的其他包python_requires: python的版本需求package_data: 需要的额外的文件,例如包强依赖一个本地文件,可以使用如下package_data={ 'sample': ['package_data.dat'], },3. 打包
打包命令为
python setup.py cmdcmd可以取值为
bdist_wheel : create a wheel distribution
bdist_egg : create an “egg” distribution
sdist : create a source distribution (tarball, zip file, etc.)
bdist : create a built (binary) distribution
bdist_dumb : create a “dumb” built distribution
bdist_rpm : create an RPM distribution
bdist_wininst : create an executable installer for MS Windows
打包为tar.gz
python setup.py sdist打包好的文件再dist目录下
4. 上传
可以首先使用
twine对包进行检查twine check dist/*输出如下

再运行上传命令
twine upload dist/*到此这篇关于用Python将库打包发布到pypi的文章就介绍到这了,更多相关python打包到pypi内容请搜索python博客以前的文章或继续浏览下面的相关文章希望大家以后多多支持python博客!
-
<< 上一篇 下一篇 >>
标签:requests
用Python将库打包发布到pypi
看: 1666次 时间:2021-04-26 分类 : python教程
- 相关文章
- 2021-12-20Python 实现图片色彩转换案例
- 2021-12-20python初学定义函数
- 2021-12-20图文详解Python如何导入自己编写的py文件
- 2021-12-20python二分法查找实例代码
- 2021-12-20Pyinstaller打包工具的使用以及避坑
- 2021-12-20Facebook开源一站式服务python时序利器Kats详解
- 2021-12-20pyCaret效率倍增开源低代码的python机器学习工具
- 2021-12-20python机器学习使数据更鲜活的可视化工具Pandas_Alive
- 2021-12-20python读写文件with open的介绍
- 2021-12-20Python生成任意波形并存为txt的实现
-
搜索
-
-
推荐资源
-
Powered By python教程网 鲁ICP备18013710号
python博客 - 小白学python最友好的网站!