我就废话不多说了,大家还是直接看代码吧~
'''
Created on 2018-4-16
'''
import keras
from keras.models import Sequential
from keras.layers import Dense
from keras.models import Model
from keras.callbacks import ModelCheckpoint,Callback
import numpy as np
import tflearn
import tflearn.datasets.mnist as mnist

x_train, y_train, x_test, y_test = mnist.load_data(one_hot=True)
x_valid = x_test[:5000]
y_valid = y_test[:5000]
x_test = x_test[5000:]
y_test = y_test[5000:]
print(x_valid.shape)
print(x_test.shape)

model = Sequential()
model.add(Dense(units=64, activation='relu', input_dim=784))
model.add(Dense(units=10, activation='softmax'))
model.compile(loss='categorical_crossentropy',
       optimizer='sgd',
       metrics=['accuracy'])
filepath = 'D:\\machineTest\\model-ep{epoch:03d}-loss{loss:.3f}-val_loss{val_loss:.3f}.h5'
# filepath = 'D:\\machineTest\\model-ep{epoch:03d}-loss{loss:.3f}.h5'
checkpoint = ModelCheckpoint(filepath, monitor='val_loss', verbose=1, save_best_only=True, mode='min')
print(model.get_config())
# [{'class_name': 'Dense', 'config': {'bias_regularizer': None, 'use_bias': True, 'kernel_regularizer': None, 'batch_input_shape': (None, 784), 'trainable': True, 'kernel_constraint': None, 'bias_constraint': None, 'kernel_initializer': {'class_name': 'VarianceScaling', 'config': {'scale': 1.0, 'distribution': 'uniform', 'mode': 'fan_avg', 'seed': None}}, 'activity_regularizer': None, 'units': 64, 'dtype': 'float32', 'bias_initializer': {'class_name': 'Zeros', 'config': {}}, 'activation': 'relu', 'name': 'dense_1'}}, {'class_name': 'Dense', 'config': {'bias_regularizer': None, 'use_bias': True, 'kernel_regularizer': None, 'bias_initializer': {'class_name': 'Zeros', 'config': {}}, 'kernel_constraint': None, 'bias_constraint': None, 'kernel_initializer': {'class_name': 'VarianceScaling', 'config': {'scale': 1.0, 'distribution': 'uniform', 'mode': 'fan_avg', 'seed': None}}, 'activity_regularizer': None, 'trainable': True, 'units': 10, 'activation': 'softmax', 'name': 'dense_2'}}]
# model.fit(x_train, y_train, epochs=1, batch_size=128, callbacks=[checkpoint],validation_data=(x_valid, y_valid))
model.fit(x_train, y_train, epochs=1,validation_data=(x_valid, y_valid),steps_per_epoch=10,validation_steps=1)
# score = model.evaluate(x_test, y_test, batch_size=128)
# print(score)
# #获取模型结构状况
# model.summary()
# _________________________________________________________________
# Layer (type)         Output Shape       Param #
# =================================================================
# dense_1 (Dense)       (None, 64)        50240(784*64+64(b))
# _________________________________________________________________
# dense_2 (Dense)       (None, 10)        650(64*10 + 10 )
# =================================================================
# #根据下标和名称返回层对象
# layer = model.get_layer(index = 0)
# 获取模型权重,设置权重model.set_weights()
weights = np.array(model.get_weights())
print(weights.shape)
# (4,)权重由4部分组成
print(weights[0].shape)
# (784, 64)dense_1 w1
print(weights[1].shape)
# (64,)dense_1 b1
print(weights[2].shape)
# (64, 10)dense_2 w2
print(weights[3].shape)
# (10,)dense_2 b2

# # 保存权重和加载权重
# model.save_weights("D:\\xxx\\weights.h5")
# model.load_weights("D:\\xxx\\weights.h5", by_name=False)#by_name=True,可以根据名字匹配和层载入权重

# 查看中间结果,必须要先声明个函数式模型
dense1_layer_model = Model(inputs=model.input,outputs=model.get_layer('dense_1').output)
out = dense1_layer_model.predict(x_test)
print(out.shape)
# (5000, 64)

# 如果是函数式模型,则可以直接输出
# import keras
# from keras.models import Model
# from keras.callbacks import ModelCheckpoint,Callback
# import numpy as np
# from keras.layers import Input,Conv2D,MaxPooling2D
# import cv2
#
# image = cv2.imread("D:\\machineTest\\falali.jpg")
# print(image.shape)
# cv2.imshow("1",image)
#
# # 第一层conv
# image = image.reshape([-1, 386, 580, 3])
# img_input = Input(shape=(386, 580, 3))
# x = Conv2D(64, (3, 3), activation='relu', padding='same', name='block1_conv1')(img_input)
# x = Conv2D(64, (3, 3), activation='relu', padding='same', name='block1_conv2')(x)
# x = MaxPooling2D((2, 2), strides=(2, 2), name='block1_pool')(x)
# model = Model(inputs=img_input, outputs=x)
# out = model.predict(image)
# print(out.shape)
# out = out.reshape(193, 290,64)
# image_conv1 = out[:,:,1].reshape(193, 290)
# image_conv2 = out[:,:,20].reshape(193, 290)
# image_conv3 = out[:,:,40].reshape(193, 290)
# image_conv4 = out[:,:,60].reshape(193, 290)
# cv2.imshow("conv1",image_conv1)
# cv2.imshow("conv2",image_conv2)
# cv2.imshow("conv3",image_conv3)
# cv2.imshow("conv4",image_conv4)
# cv2.waitKey(0)
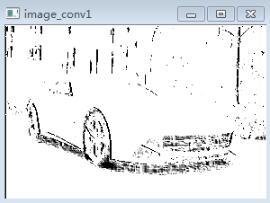
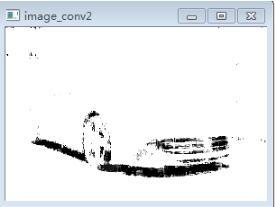
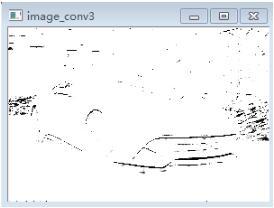
中间结果输出可以查看conv过之后的图像:
原始图像:

经过一层conv以后,输出其中4张图片:


以上这篇keras 模型参数,模型保存,中间结果输出操作就是小编分享给大家的全部内容了,希望能给大家一个参考,也希望大家多多支持python博客。
-
<< 上一篇 下一篇 >>
标签:numpy
keras 模型参数,模型保存,中间结果输出操作
看: 1289次 时间:2020-08-31 分类 : python教程
- 相关文章
- 2021-12-20Python 实现图片色彩转换案例
- 2021-12-20python初学定义函数
- 2021-12-20图文详解Python如何导入自己编写的py文件
- 2021-12-20python二分法查找实例代码
- 2021-12-20Pyinstaller打包工具的使用以及避坑
- 2021-12-20Facebook开源一站式服务python时序利器Kats详解
- 2021-12-20pyCaret效率倍增开源低代码的python机器学习工具
- 2021-12-20python机器学习使数据更鲜活的可视化工具Pandas_Alive
- 2021-12-20python读写文件with open的介绍
- 2021-12-20Python生成任意波形并存为txt的实现
-
搜索
-
-
推荐资源
-
Powered By python教程网 鲁ICP备18013710号
python博客 - 小白学python最友好的网站!