Pandas最好用的函数
Pandas是
Python语言中非常好用的一种数据结构包,包含了许多有用的数据操作方法。而且很多算法相关的库函数的输入数据结构都要求是pandas数据,或者有该数据的接口。仔细看pandas的API说明文档,就会发现有好多有用的函数,比如非常常用的文件的读写函数就包括如下函数:
Format Type Data Description Reader Writer text CSV read_csv to_csv text JSON read_json to_json text HTML read_html to_html text Local clipboard read_clipboard to_clipboard binary MS Excel read_excel to_excel binary HDF5 Format read_hdf to_hdf binary Feather Format read_feather to_feather binary Parquet Format read_parquet to_parquet binary Msgpack read_msgpack to_msgpack binary Stata read_stata to_stata binary SAS read_sas binary Python Pickle Format read_pickle to_pickle SQL SQL read_sql to_sql SQL Google Big Query read_gbq to_gbq 读取数据后,对于数据处理来说,有好多有用的相关操作的函数,但是我认为其中最好用的函数是下面这个函数:
apply函数
apply函数是`pandas`里面所有函数中自由度最高的函数。该函数如下:
DataFrame.apply(func, axis=0, broadcast=False, raw=False, reduce=None, args=(), **kwds)该函数最有用的是第一个参数,这个参数是函数,相当于
C/C++的函数指针。这个函数需要自己实现,函数的传入参数根据
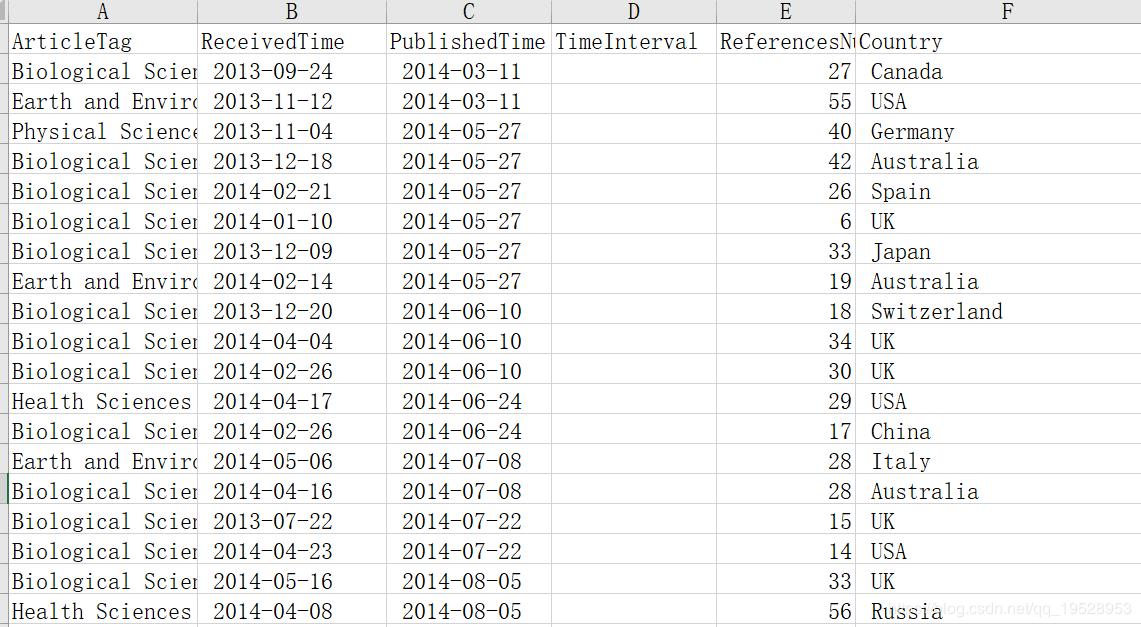
axis来定,比如axis = 1,就会把一行数据作为Series的数据结构传入给自己实现的函数中,我们在函数中实现对Series不同属性之间的计算,返回一个结果,则apply函数会自动遍历每一行DataFrame的数据,最后将所有结果组合成一个Series数据结构并返回。比如读取一个表格:

假如我们想要得到表格中的
PublishedTime和ReceivedTime属性之间的时间差数据,就可以使用下面的函数来实现:import pandas as pd import datetime #用来计算日期差的包 def dataInterval(data1,data2): d1 = datetime.datetime.strptime(data1, '%Y-%m-%d') d2 = datetime.datetime.strptime(data2, '%Y-%m-%d') delta = d1 - d2 return delta.days def getInterval(arrLike): #用来计算日期间隔天数的调用的函数 PublishedTime = arrLike['PublishedTime'] ReceivedTime = arrLike['ReceivedTime'] # print(PublishedTime.strip(),ReceivedTime.strip()) days = dataInterval(PublishedTime.strip(),ReceivedTime.strip()) #注意去掉两端空白 return days if __name__ == '__main__': fileName = "NS_new.xls"; df = pd.read_excel(fileName) df['TimeInterval'] = df.apply(getInterval , axis = 1)有时候,我们想给自己实现的函数传递参数,就可以用的
apply函数的*args和**kwds参数,比如同样的时间差函数,我希望自己传递时间差的标签,这样没次标签更改就不用修改自己实现的函数了,实现代码如下:import pandas as pd import datetime #用来计算日期差的包 def dataInterval(data1,data2): d1 = datetime.datetime.strptime(data1, '%Y-%m-%d') d2 = datetime.datetime.strptime(data2, '%Y-%m-%d') delta = d1 - d2 return delta.days def getInterval_new(arrLike,before,after): #用来计算日期间隔天数的调用的函数 before = arrLike[before] after = arrLike[after] # print(PublishedTime.strip(),ReceivedTime.strip()) days = dataInterval(after.strip(),before.strip()) #注意去掉两端空白 return days if __name__ == '__main__': fileName = "NS_new.xls"; df = pd.read_excel(fileName) df['TimeInterval'] = df.apply(getInterval_new , axis = 1, args = ('ReceivedTime','PublishedTime')) #调用方式一 #下面的调用方式等价于上面的调用方式 df['TimeInterval'] = df.apply(getInterval_new , axis = 1, **{'before':'ReceivedTime','after':'PublishedTime'}) #调用方式二 #下面的调用方式等价于上面的调用方式 df['TimeInterval'] = df.apply(getInterval_new , axis = 1, before='ReceivedTime',after='PublishedTime') #调用方式三修改后的
getInterval_new函数多了两个参数,这样我们在使用apply函数的时候要自己传递参数,代码中显示的三种传递方式都行。最后,本篇的全部代码在下面这个网页可以下载:
https://github.com/Dongzhixiao/Python_Exercise/tree/master/pandas_apply
到此这篇关于Pandas的Apply函数具体使用的文章就介绍到这了,更多相关Pandas Apply函数内容请搜索python博客以前的文章或继续浏览下面的相关文章希望大家以后多多支持python博客!
-
<< 上一篇 下一篇 >>
标签:pandas
Pandas的Apply函数具体使用
看: 1376次 时间:2020-08-25 分类 : python教程
- 相关文章
- 2021-12-20Python 实现图片色彩转换案例
- 2021-12-20python初学定义函数
- 2021-12-20图文详解Python如何导入自己编写的py文件
- 2021-12-20python二分法查找实例代码
- 2021-12-20Pyinstaller打包工具的使用以及避坑
- 2021-12-20Facebook开源一站式服务python时序利器Kats详解
- 2021-12-20pyCaret效率倍增开源低代码的python机器学习工具
- 2021-12-20python机器学习使数据更鲜活的可视化工具Pandas_Alive
- 2021-12-20python读写文件with open的介绍
- 2021-12-20Python生成任意波形并存为txt的实现
-
搜索
-
-
推荐资源
-
Powered By python教程网 鲁ICP备18013710号
python博客 - 小白学python最友好的网站!