安装qrcode库
pip install qrcode声明
import qrcode使用qrcode
QRCode 方法
qrcode.QRCode(
  version=1,
  error_correction=qrcode.ERROR_CORRECT_L,
  box_size=10,
  border=4,
  image_factory=None,
  mask_pattern=None
)
参数解释:
- version:控制二维码的大小,取值范围从1到40。取最小值1时,二维码大小为21*21。取值为 None (默认)或者使用fit=true参数(默认)时,二维码会自动调整大小。
- error_correction:控制二维码纠错级别。
ERROR_CORRECT_L:大约7%或者更少的错误会被更正。
ERROR_CORRECT_M:默认值,大约15%或者更少的错误会被更正。
ERROR_CORRECT_Q:大约25%或者更少的错误会被更正。
ERROR_CORRECT_H:大约30%或者更少的错误会被更正。
- box_size:控制二维码中每个格子的像素数,默认为 10。
- border:控制二维码四周留白包含的格子数,默认为4。
- image_factory:选择生成图片的形式,默认为 PIL 图像。
- mask_pattern:选择生成图片的的掩模。
qrcode方法属性解释:
常用方法:
- add_data(str,optimize=20):添加要转换的文字到data参数;如果使用了optimize优化参数,数据将被拆分为多个块来进行优化,以找到一个长度至少为这个值的足够简洁的方式来生成二维码。设置为“0”以避免优化。
- make(fit=True):当fit参数为真或者没有给出version参数时,将会调用best_fit方法来找到适合数据的最小尺寸。如果没有设置mask_pattern,将会调用best_mask_pattern方法来找到找到最有效的掩模图案。最后将这些数据传递给makeImpl方法来生成二维码。与qrcode本体的make方法不一样的是,这个方法没有任何返回值。
- make_image(fill_color=None, back_color=None,image_factory=None):创建二维码的图像并返回,默认为 PIL 图像。如果要让二维码有颜色,可以在这里设置fill_color, back_color
- clear:清空数据
- get_matrix:返回二维码数组。
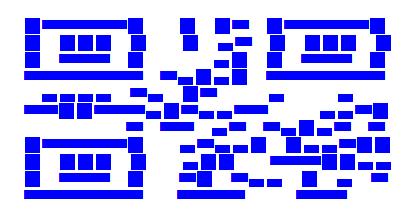
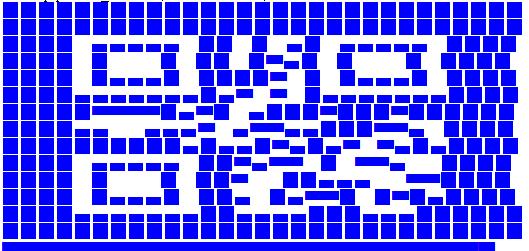
- print_ascii(out=None, tty=False, invert=False):这个方法就比较有趣了,可以用字符画的形式来输出二维码,但是扫的时候一般都扫不出来。

其中的invert参数是决定是否反转颜色的参数,默认为假,如果为真的话会这样:

其他方法:
- best_fit(start=self.version):找到适合数据所需的最小尺寸。
- best_mask_pattern():找到最有效的掩模图案。
- makeImpl(test, mask_pattern):生成二维码的直接函数
- map_data:(内部函数,无需了解)
- print_tty(out=None):用TTY颜色输出二维码,如果没有给出out参数,会使用sys.stdout。
- setup_position_adjust_pattern:(内部函数,无需了解)
- setup_position_probe_pattern:(内部函数,无需了解)
- setup_timing_pattern:(内部函数,无需了解)
- setup_type_info:(内部函数,无需了解)
- setup_type_number:(内部函数,无需了解)
属性(这些大家基本都不用管):
- border:
- box_size:
- data_cache:
- data_list:
- error_correction:
- image_factory:
- mask_pattern:
- modules:
- modules_count:
- version:
生成 SVG 图像
qrcode可以生成三种不同的svg图像,一种是用路径表示的svg,一种是用矩形集合表示的完整svg文件,还有一种是用矩形集合表示的svg片段。第一种用路径表示的svg其实就是矢量图,可以在图像放大的时候可以保持图片质量,而另外两种可能会在格子之间出现空隙。
这三种分别对应了svg.py中的SvgPathImage、SvgImage和SvgFragmentImage类。在调用qrcode.make函数或者实例化QRCode时当作image_factory参数的值传入就可以了。
import qrcode.image.svg

if method == 'basic':
  # Simple factory, just a set of rects.
  factory = qrcode.image.svg.SvgImage
elif method == 'fragment':
  # Fragment factory (also just a set of rects)
  factory = qrcode.image.svg.SvgFragmentImage
else:
  # Combined path factory, fixes white space that may occur when zooming
  factory = qrcode.image.svg.SvgPathImage

img = qrcode.make('Some data here', image_factory=factory)
生成 PNG 图像
执行命令安装pymaging相关模块:
pip install git+git://github.com/ojii/pymaging.git#egg=pymaging

pip install git+git://github.com/ojii/pymaging-png.git#egg=pymaging-png
然后给image_factor参数传入qrcode.image.pure.PymagingImage就可以生成PNG图片了。
import qrcode
from qrcode.image.pure import PymagingImage
img = qrcode.make('Some data here', image_factory=PymagingImage)
这是作者推荐的方式,但是我个人认为,完全没有必要这么麻烦,直接用默认的 PIL 就可以获取 PNG 图片了,例子看下文。
make 方法
make方法实际上就是在内部调用了QRCode(要转换的文本).make_image(),最后(默认)返回了一个PIL图像对象。
# 显示图片
qrcode.make("hello world!").show()
# 保存 PNG 图片
qrcode.make("hello world!").save('hello.png')
run_example 方法
生成一个作者项目网站地址的二维码并显示出来。
更多关于Python使用qrcode二维码库生成二维码方法请查看下面的相关链接
-
<< 上一篇 下一篇 >>
Python使用qrcode二维码库生成二维码方法详解
看: 1342次 时间:2020-07-29 分类 : python教程
- 相关文章
- 2021-12-20Python 实现图片色彩转换案例
- 2021-12-20python初学定义函数
- 2021-12-20图文详解Python如何导入自己编写的py文件
- 2021-12-20python二分法查找实例代码
- 2021-12-20Pyinstaller打包工具的使用以及避坑
- 2021-12-20Facebook开源一站式服务python时序利器Kats详解
- 2021-12-20pyCaret效率倍增开源低代码的python机器学习工具
- 2021-12-20python机器学习使数据更鲜活的可视化工具Pandas_Alive
- 2021-12-20python读写文件with open的介绍
- 2021-12-20Python生成任意波形并存为txt的实现
-
搜索
-
-
推荐资源
-
Powered By python教程网 鲁ICP备18013710号
python博客 - 小白学python最友好的网站!